A blog for the my love of Warhammer 40K. It's mainly battle reports written in a narrative format but will also cover a few other posts and musings. I hope you enjoy.
Saturday, 28 January 2017
Update
With the recent Fall of Cadia sourcebook tweaking the story of the 13th Black Crusade a little bit I shall be having to alter some of the future battle reports a little and adding extra war zones to compensate. But what we have in the new book series should make for some interesting additions.
I plan to try and go a bit more in depth for the reports in future where I can. Most are written a few days after the game so some details are lost or rather hazy. Plus, as much as I would like to write a turn by turn report, I doubt I'd have the time when playing nor would I want to slow down the game for my opponents but I shall see what I can do. I'll try to include army lists from both sides where I can.
Hope you are still enjoying reading the blog though, and here's to the fall of Cadia and an end to the weakling minions of the false Emperor!
Friday, 27 January 2017
Tactical Escalation - Cadia
Planet: Cadia.
Region: Cadian Sector.
999.M41
Death Guard vs Skitarii
2000 points:
Mission: Tactical Escalation.
The mission was simple. The despoiler had dispatched Virulex to capture and occupy a cluster of pylons close to the front lines. Had not the master of the Death Guard pledged his services to the Black Legion, the mighty daemon prince would have smote Abaddon's head from his shoulders for such an insulting task.
Things changed however, when the task force arrived to find a detachment of Mechanicus operatives led by Belasarius Caul himself studying the pylons. What a gift it would be to gift his master with the still screeching head of the false god's servant. Raising his mighty blade to the skies, Virulex ordered a charge into the rapidly deploying Skitarii lines.
We’ve now got a Skitarii player at the club and as the Ad mech armies are one of a couple I have yet to play against I challenged him to a game. 2000 points and we rolled Tactical Escalation.
I had seen that he played Belisarius Caul and two Knights (one an Atropos class) so I was unsure what to take against him. Had a week to prepare and I just could not decide on a suitable list. I knew I wanted my Chaos Knight so that forced me into a Combined Arms detachment. Decided to play a daemon prince for the first time as well to hopefully help mow down his troops.
We rolled that annoying corner formation and my opponent managed to seize the initiative. It didn’t do him much good and neither of us had a great first half of the game. In the first three turns neither of us had objective cards we could easily score and the only casualties were two of my rhinos and a wound on one of his robots. No reserves came in on either side. It was three turns of moving forward.
My chaos knight finally got into combat and began to slowly smash his way through things. He lasted two turns before exploding most impressively, and when the dust cleared there was a tech-priest type figure (I forget the name), three walkers and Caul with one wound remaining left standing in the crater! I’d have liked for it to hang around but it’s death made the points up.
On my left flank the daemon prince was dropped by two rounds of sniper fire from his rangers. I really remember daemon princes being tougher than that but I guess that is small arms fire for you. His reserves came in turn 4 outflanking into my chaos marines. Battle was joined and although He smashed his troops the remaining marines died to being trodden on by his walkers.
Both Heldrakes came in turn 4. One did nothing before being blown out of the sky. The other took out half of his troop unit before the following turn once more dropping to anti-air fire. This was the first game in a long time where a player I have faced has brought anti-air. I have been playing the heldrakes a lot lately so I should have expected it.
Come turn 6 and Chris was 12 victory points to my none. The cards all came up in his favour and I just could not achieve any of mine as he whittled my forces away before they could manage anything. Even the mark of Nurgle could not save me this time!
But I did go into this game deciding that it was a learning experience. I have a better idea how to handle the Skitarii in future but I’ll need to get some more models to achieve that victory. Good game.
My list:
Daemon Prince.
Mark of Nurgle. Power armour. Pusbringer (relic).
1 unit of 10 Chaos Cultists.
Mark of Nurgle.
2 units of 10 Chaos Space marines.
Mark of Nurgle. Two meltaguns.
Champion: Plasma pistol and power weapon. Melta bombs.
Rhino transport with extra combi-bolter.
Helbrute.
Multi-melta and power fist.
Heldrake Terror Pack (2 drakes).
Chaos Knight.
Daemon knight of Nurgle. Thermal blaster. Foe-ripper chainsword.
Region: Cadian Sector.
999.M41
Death Guard vs Skitarii
2000 points:
Mission: Tactical Escalation.
The mission was simple. The despoiler had dispatched Virulex to capture and occupy a cluster of pylons close to the front lines. Had not the master of the Death Guard pledged his services to the Black Legion, the mighty daemon prince would have smote Abaddon's head from his shoulders for such an insulting task.
Things changed however, when the task force arrived to find a detachment of Mechanicus operatives led by Belasarius Caul himself studying the pylons. What a gift it would be to gift his master with the still screeching head of the false god's servant. Raising his mighty blade to the skies, Virulex ordered a charge into the rapidly deploying Skitarii lines.
We’ve now got a Skitarii player at the club and as the Ad mech armies are one of a couple I have yet to play against I challenged him to a game. 2000 points and we rolled Tactical Escalation.
I had seen that he played Belisarius Caul and two Knights (one an Atropos class) so I was unsure what to take against him. Had a week to prepare and I just could not decide on a suitable list. I knew I wanted my Chaos Knight so that forced me into a Combined Arms detachment. Decided to play a daemon prince for the first time as well to hopefully help mow down his troops.
We rolled that annoying corner formation and my opponent managed to seize the initiative. It didn’t do him much good and neither of us had a great first half of the game. In the first three turns neither of us had objective cards we could easily score and the only casualties were two of my rhinos and a wound on one of his robots. No reserves came in on either side. It was three turns of moving forward.
My chaos knight finally got into combat and began to slowly smash his way through things. He lasted two turns before exploding most impressively, and when the dust cleared there was a tech-priest type figure (I forget the name), three walkers and Caul with one wound remaining left standing in the crater! I’d have liked for it to hang around but it’s death made the points up.
On my left flank the daemon prince was dropped by two rounds of sniper fire from his rangers. I really remember daemon princes being tougher than that but I guess that is small arms fire for you. His reserves came in turn 4 outflanking into my chaos marines. Battle was joined and although He smashed his troops the remaining marines died to being trodden on by his walkers.
Both Heldrakes came in turn 4. One did nothing before being blown out of the sky. The other took out half of his troop unit before the following turn once more dropping to anti-air fire. This was the first game in a long time where a player I have faced has brought anti-air. I have been playing the heldrakes a lot lately so I should have expected it.
Come turn 6 and Chris was 12 victory points to my none. The cards all came up in his favour and I just could not achieve any of mine as he whittled my forces away before they could manage anything. Even the mark of Nurgle could not save me this time!
But I did go into this game deciding that it was a learning experience. I have a better idea how to handle the Skitarii in future but I’ll need to get some more models to achieve that victory. Good game.
My list:
Daemon Prince.
Mark of Nurgle. Power armour. Pusbringer (relic).
1 unit of 10 Chaos Cultists.
Mark of Nurgle.
2 units of 10 Chaos Space marines.
Mark of Nurgle. Two meltaguns.
Champion: Plasma pistol and power weapon. Melta bombs.
Rhino transport with extra combi-bolter.
Helbrute.
Multi-melta and power fist.
Heldrake Terror Pack (2 drakes).
Chaos Knight.
Daemon knight of Nurgle. Thermal blaster. Foe-ripper chainsword.
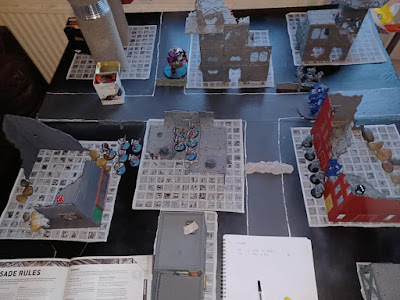
Warlord Virulex leads ahead of an insane helbrute to the western flank in a vain attempt to engage the Skitarii ground troops. Neither made it into combat due to incoming fire.
The Dominus Pestilens engages in deadly hand to hand combat with the Skitarii war machines.
A scene of carnage as the Skitarii successfully hold off against the forces of Nurgle.
Friday, 13 January 2017
Supply Raid - Tanis IV
Planet: Tanis IV.
Region: Loki Sector.
990.M41
Death Guard vs Crimson Fists
1750 points:
Mission: The Relic.
Utilising the devastation of the Crimson Fists' home world, a Death Guard raiding force exit the warp above the war torn world of Tanis IV. Deploying to the surface the Death Guard eradicate any surviving Ork presence and then make for the loyalists' stockpiles seeking to restock their own munitions. After breaching the fortress walls, the chosen of Nurgle advance hungrily searching for any supplies. An hour after the fortress walls fell, a small force of Crimson Fists marines arrive to investigate and a battle is joined.
One of our original players, a young chap known the length of club simply as “Muffin” (don’t ask…) challenged my Death Guard to a 1750 point match last night. I could not turn down such a challenge so I accepted. Last time I played against him he was using a solid Dark Angels list but he has changed his choice of army, and now plays Crimson Fists. With that in mind I expected to face Cantor, tactical squads in rhinos, maybe some terminators and a devastator squad. The usual space marine list. What I actually found was a mechanised list made from two formations. So straight away I thought this was going to be an interesting challenge. In return he was not expecting an army of T5 and a Heldrake terror pack, Mission was rolled and we were fighting The Relic.
Muffin was lucky and seized the initiative. Thankfully, a mixture of night fight and everything in cover his shooting was largely ineffective. I think one rhino lost a hull point but that was it. I simply moved up to get a better shot at the Relic. Turn 2 saw his shooting wreck one rhino forcing my chaos marines to march forward under cover of a surviving section of woodland. My turn 2 was better with a Heldrake swooping in and taking out half of his devastator squad. So much for bolstering that cover with the chapter tactics. My land raider tried to bring down his vindicators but the lascannons failed to breach the armour.
Turn 3 started to swing the game in my favour. On Muffin’s turn he leapt his captain and command squad out of their rhino ready to assault my chaos marine unit just within reach of the relic. He fired a vindicator at my land raider and the shot deviated so that it covered his command squad and wiped out all bar the standard bearer! That one space marine wasn’t there much longer and I grabbed the Relic.
My raptors proved useless as they deviated their deep strike into terrain and one marine died. All but two then died due to demolisher cannon blasts. They did get into combat eventually, felling a single marine, and causing them to fall back into the path of a heldrake’s baleflamer!
My second heldrake came on and blasted a pair of land speeders that wound up in my deployment zone, looking to halt my retreat with the Relic. Not overly effective but one multi-melta was torn free.
The terminators were out of place and when the land raider was immobilised they were forced to try and get away from the big guns but concentrated fire dropped them quickly.
The turns sped up quickly after that and on turn 6 I was left with just my sorcerer holding the relic and holding his own against the loyalist marines in combat. Luckily the game ended on turn 6 otherwise Muffin may have been able to seize the Relic and get away with it. I won 3 points to 2.
A very good game, but tough. I didn’t have a lot to deal with his tanks so I concentrated on just getting to the Relic and holding on to it. Hopefully Muffin enjoyed the game and we’ll see him at the club again some time soon.
Region: Loki Sector.
990.M41
Death Guard vs Crimson Fists
1750 points:
Mission: The Relic.
Utilising the devastation of the Crimson Fists' home world, a Death Guard raiding force exit the warp above the war torn world of Tanis IV. Deploying to the surface the Death Guard eradicate any surviving Ork presence and then make for the loyalists' stockpiles seeking to restock their own munitions. After breaching the fortress walls, the chosen of Nurgle advance hungrily searching for any supplies. An hour after the fortress walls fell, a small force of Crimson Fists marines arrive to investigate and a battle is joined.
One of our original players, a young chap known the length of club simply as “Muffin” (don’t ask…) challenged my Death Guard to a 1750 point match last night. I could not turn down such a challenge so I accepted. Last time I played against him he was using a solid Dark Angels list but he has changed his choice of army, and now plays Crimson Fists. With that in mind I expected to face Cantor, tactical squads in rhinos, maybe some terminators and a devastator squad. The usual space marine list. What I actually found was a mechanised list made from two formations. So straight away I thought this was going to be an interesting challenge. In return he was not expecting an army of T5 and a Heldrake terror pack, Mission was rolled and we were fighting The Relic.
Muffin was lucky and seized the initiative. Thankfully, a mixture of night fight and everything in cover his shooting was largely ineffective. I think one rhino lost a hull point but that was it. I simply moved up to get a better shot at the Relic. Turn 2 saw his shooting wreck one rhino forcing my chaos marines to march forward under cover of a surviving section of woodland. My turn 2 was better with a Heldrake swooping in and taking out half of his devastator squad. So much for bolstering that cover with the chapter tactics. My land raider tried to bring down his vindicators but the lascannons failed to breach the armour.
Turn 3 started to swing the game in my favour. On Muffin’s turn he leapt his captain and command squad out of their rhino ready to assault my chaos marine unit just within reach of the relic. He fired a vindicator at my land raider and the shot deviated so that it covered his command squad and wiped out all bar the standard bearer! That one space marine wasn’t there much longer and I grabbed the Relic.
My raptors proved useless as they deviated their deep strike into terrain and one marine died. All but two then died due to demolisher cannon blasts. They did get into combat eventually, felling a single marine, and causing them to fall back into the path of a heldrake’s baleflamer!
My second heldrake came on and blasted a pair of land speeders that wound up in my deployment zone, looking to halt my retreat with the Relic. Not overly effective but one multi-melta was torn free.
The terminators were out of place and when the land raider was immobilised they were forced to try and get away from the big guns but concentrated fire dropped them quickly.
The turns sped up quickly after that and on turn 6 I was left with just my sorcerer holding the relic and holding his own against the loyalist marines in combat. Luckily the game ended on turn 6 otherwise Muffin may have been able to seize the Relic and get away with it. I won 3 points to 2.
A very good game, but tough. I didn’t have a lot to deal with his tanks so I concentrated on just getting to the Relic and holding on to it. Hopefully Muffin enjoyed the game and we’ll see him at the club again some time soon.
Wednesday, 11 January 2017
Pre-Emptive Strike - Caseopeia
Planet: Caseopeia.
Region: Cadian Sector.
999.M41
Death Guard vs Eldar Corsairs.
1500pts.
Mission: Pre-Emptive Strike.
The Void Dreamers of the corsairs have foreseen a time when, if not stopped, Typhus could devestate this world with his foul plagues. To this end they orchestrate an attack upon his headquarters out in the badlands. A dawn strike to catch him unawares and disrupt his plans of destruction and chaos.
My friend Danny has recently started buying into an Eldar Corsair army so I challenged him to a game to try out my Traitor Legion rules again. Danny choose to play the Pre-Emptive Strike mission and 2000 points.
My forces had to sit quite bunched up to start with as the mission assumes I’m being surprised by the Eldar attack while his were spread out nicely along his deployment line. He was confident but had some concerns about the Heldrake terror pack as he had nothing to bring down fliers.
Danny had the first turn and moved everything up. His shooting was mostly ineffective but a well placed D shot from his Warp Hunter took out a Rhino and left one squad of chaos marines to slog across the battle field. My first turn saw me split up my forces so his D weapon couldn’t hit too many at once. I had limited shooting and what I did fire failed to do anything.
The game soon sped up Danny’s corsairs swooped in to cut down many chaos marines with shuriken fire. Even so having everything in my army T5 made things difficult for him. My turn two and one Heldrake and the Raptor squad came in from reserve. The Heldrake was out of range but the Raptors dropped two flamers and took out some jetbikes and their bolt pistols struck wounds off his Void Dreamer.
Over the third turn, I lost most of one squad of chaos marines (those who had lost their rhino turn 1) and the second squad lost their rhino to concentrated fire from the Hornet’s and War Walkers. He assaulted my Raptors with both his prince and Void Dreamer. The Void Dreamer lost all but one wound in the over watch. A challenge was called and the Raptor champion dropped dead before getting to swing. The rest of the Raptors tore down the Void Dreamer and the rest turned their attention to the Prince.
The second Heldrake came in and both let rip with their baleflamers, which decimated the two jetbike squads. The Raptors continued to pummel the Prince but neither side could really hurt one another. The chaos marines on my right side assaulted the last jetbike in one squad and they would be held up till the end of the game.
Turn four; Typhus and his sorcerer meet their end at the centre of a D cannon strike. Typhus pulled away into the Warp at the last moment. With no other legitimate targets, Danny pulls his forces back and the assaults continue. My Heldrakes enter hover mode and flamer two units of snipers. One unit falls back in terror.
The last turn saw Danny do nothing. I finally got to use the meteroric descent rule for a Heldrake and it swooped into one unit of snipers, snapping them up in it’s talons.
The game ended turn 5. The mission had been in my opponent;s court and it ended close on 16 to my 12. Good game and I certainly enjoyed it more and learned the new legion rules better in this match.
Region: Cadian Sector.
999.M41
Death Guard vs Eldar Corsairs.
1500pts.
Mission: Pre-Emptive Strike.
The Void Dreamers of the corsairs have foreseen a time when, if not stopped, Typhus could devestate this world with his foul plagues. To this end they orchestrate an attack upon his headquarters out in the badlands. A dawn strike to catch him unawares and disrupt his plans of destruction and chaos.
My friend Danny has recently started buying into an Eldar Corsair army so I challenged him to a game to try out my Traitor Legion rules again. Danny choose to play the Pre-Emptive Strike mission and 2000 points.
My forces had to sit quite bunched up to start with as the mission assumes I’m being surprised by the Eldar attack while his were spread out nicely along his deployment line. He was confident but had some concerns about the Heldrake terror pack as he had nothing to bring down fliers.
Danny had the first turn and moved everything up. His shooting was mostly ineffective but a well placed D shot from his Warp Hunter took out a Rhino and left one squad of chaos marines to slog across the battle field. My first turn saw me split up my forces so his D weapon couldn’t hit too many at once. I had limited shooting and what I did fire failed to do anything.
The game soon sped up Danny’s corsairs swooped in to cut down many chaos marines with shuriken fire. Even so having everything in my army T5 made things difficult for him. My turn two and one Heldrake and the Raptor squad came in from reserve. The Heldrake was out of range but the Raptors dropped two flamers and took out some jetbikes and their bolt pistols struck wounds off his Void Dreamer.
Over the third turn, I lost most of one squad of chaos marines (those who had lost their rhino turn 1) and the second squad lost their rhino to concentrated fire from the Hornet’s and War Walkers. He assaulted my Raptors with both his prince and Void Dreamer. The Void Dreamer lost all but one wound in the over watch. A challenge was called and the Raptor champion dropped dead before getting to swing. The rest of the Raptors tore down the Void Dreamer and the rest turned their attention to the Prince.
The second Heldrake came in and both let rip with their baleflamers, which decimated the two jetbike squads. The Raptors continued to pummel the Prince but neither side could really hurt one another. The chaos marines on my right side assaulted the last jetbike in one squad and they would be held up till the end of the game.
Turn four; Typhus and his sorcerer meet their end at the centre of a D cannon strike. Typhus pulled away into the Warp at the last moment. With no other legitimate targets, Danny pulls his forces back and the assaults continue. My Heldrakes enter hover mode and flamer two units of snipers. One unit falls back in terror.
The last turn saw Danny do nothing. I finally got to use the meteroric descent rule for a Heldrake and it swooped into one unit of snipers, snapping them up in it’s talons.
The game ended turn 5. The mission had been in my opponent;s court and it ended close on 16 to my 12. Good game and I certainly enjoyed it more and learned the new legion rules better in this match.
Thursday, 5 January 2017
Rise of the Wulfen - Cadia
Mission: Black Crusade.
Deployment: Special.
Points: 2000 points.
Death Guard vs Space Wolves.
Cadia will fall! After some severe set backs the traitor advance across the battlefields of Cadia has begun anew. On the fields outside of Cadia's second city the Death Guard had successfully secured a number of vital objectives. As they looked to the skies, a torrent of drop pods ploughed into their lines. Ragnar Blackmane entered the war with a contingent of Wulfen at his command. Typhus barked orders to his battle brothers to pull back and prepare to engage!
Yesterday I got my first 40K game of the new year against my nephew. I was trying out a 2000 point list with the new Death Guard rules from Traitor Legions and he was proxying a random mix of models to see if he wanted to get into playing Space Wolves (using the new Wulfen rules) - hence the random mix of models on the table.
My list was the Verculium (or however it is is spelt), with a Chaos Warband, Lord of the Legion (a sorcerer) and a two flyer Heldrake Terror Pack. 1996 points in total. I lost track of what strange formations and detachment he was using. Only that it was based around Ragnar and had a turn one all drop pod assault and some Wulfen formations. Mission rolled was Black Crusade from the Altar of War book.
Straight away I may have made a small mistake. Knowing that he was playing the drop pod assault I decided to bunch everything together with the idea that I would everything to hand to repel borders. Benjo thought it a bad idea but I tried it out. Initially luck was with me as half of his drop pods deviated away giving me a chance. First turn was over very quickly with no casualties except for my chaos land raider which decided to immobilise itself on a wall but it proved a suitable wall to block line of sight.
Turn two and all my reserves came in at once. The raptors dropped down behind him where his two deviated drop pods had fallen. Flamers and bolt pistols cut down several and gace him pause. The heldrake terror pack swooped in together and spat baleflame into some small units but storm shields ensured that he suffered no casualties. I did managed to cut down some small squads and by the end of turn 3 I had chalked up 3 victory points but from here on everything started to go down hill.
Turn 4 his units hit my lines and hard. Even with toughness 5 and feel no pain on everything my chaos marines dropped liked flies. He close combat he was a monster. Even my helbrute was not immune. As it charged in to assault Lukas the Trickster’s squad, a lucky plasma shot ripped the power claw from it and condemning to a slow and drawn out assault for the rest of the game.
The Black Crusade rules mean that any infantry unit destroyed walks on from reserve on the next turn. This just meant that he pummelled squad after squad down when they walked back on. I could have had them arrive away from the mosh but they wouldn’t have done anything in the game. It was a case of damned if I did and damned if I didn’t.
The Heldrakes were a bit of a waste. They took down three squads but one lost it’s baleflamer to a flakk missile and their turning arcs meant they were rarely in a position to do much more. They were probably the only units that didn’t really earn their keep this game.
By the time the game ended Benjo was on 11 victory points to my 4. It was a disappointing game but I put the blame more on the mission special rules which just kept giving him victory points. Maybe if I had spread my units during deployment things may have been different. But for the first game with the new Legion rules I can’t grumble.
Deployment: Special.
Points: 2000 points.
Death Guard vs Space Wolves.
Cadia will fall! After some severe set backs the traitor advance across the battlefields of Cadia has begun anew. On the fields outside of Cadia's second city the Death Guard had successfully secured a number of vital objectives. As they looked to the skies, a torrent of drop pods ploughed into their lines. Ragnar Blackmane entered the war with a contingent of Wulfen at his command. Typhus barked orders to his battle brothers to pull back and prepare to engage!
Yesterday I got my first 40K game of the new year against my nephew. I was trying out a 2000 point list with the new Death Guard rules from Traitor Legions and he was proxying a random mix of models to see if he wanted to get into playing Space Wolves (using the new Wulfen rules) - hence the random mix of models on the table.
My list was the Verculium (or however it is is spelt), with a Chaos Warband, Lord of the Legion (a sorcerer) and a two flyer Heldrake Terror Pack. 1996 points in total. I lost track of what strange formations and detachment he was using. Only that it was based around Ragnar and had a turn one all drop pod assault and some Wulfen formations. Mission rolled was Black Crusade from the Altar of War book.
Straight away I may have made a small mistake. Knowing that he was playing the drop pod assault I decided to bunch everything together with the idea that I would everything to hand to repel borders. Benjo thought it a bad idea but I tried it out. Initially luck was with me as half of his drop pods deviated away giving me a chance. First turn was over very quickly with no casualties except for my chaos land raider which decided to immobilise itself on a wall but it proved a suitable wall to block line of sight.
Turn two and all my reserves came in at once. The raptors dropped down behind him where his two deviated drop pods had fallen. Flamers and bolt pistols cut down several and gace him pause. The heldrake terror pack swooped in together and spat baleflame into some small units but storm shields ensured that he suffered no casualties. I did managed to cut down some small squads and by the end of turn 3 I had chalked up 3 victory points but from here on everything started to go down hill.
Turn 4 his units hit my lines and hard. Even with toughness 5 and feel no pain on everything my chaos marines dropped liked flies. He close combat he was a monster. Even my helbrute was not immune. As it charged in to assault Lukas the Trickster’s squad, a lucky plasma shot ripped the power claw from it and condemning to a slow and drawn out assault for the rest of the game.
The Black Crusade rules mean that any infantry unit destroyed walks on from reserve on the next turn. This just meant that he pummelled squad after squad down when they walked back on. I could have had them arrive away from the mosh but they wouldn’t have done anything in the game. It was a case of damned if I did and damned if I didn’t.
The Heldrakes were a bit of a waste. They took down three squads but one lost it’s baleflamer to a flakk missile and their turning arcs meant they were rarely in a position to do much more. They were probably the only units that didn’t really earn their keep this game.
By the time the game ended Benjo was on 11 victory points to my 4. It was a disappointing game but I put the blame more on the mission special rules which just kept giving him victory points. Maybe if I had spread my units during deployment things may have been different. But for the first game with the new Legion rules I can’t grumble.
Sunday, 1 January 2017
Happy New Year!
Happy New Year fellow enthusiasts. Here's too 2017 being good for gaming.
I've now got myself a copy of the new Traitor Legions book and it looks like my Death Guard are going to get a much needed boost. Looking forward as well to the new war for Cadia story line.
Now I just want 2017 to bring me a Mortarion daemon primarch and I'll be happy.
I've now got myself a copy of the new Traitor Legions book and it looks like my Death Guard are going to get a much needed boost. Looking forward as well to the new war for Cadia story line.
Now I just want 2017 to bring me a Mortarion daemon primarch and I'll be happy.
Saturday, 10 December 2016
Broken Comm Lines - D'Then
Planet: D'Then.
Region: Perdus Rift.
990.M41
Death Guard vs Tau Empire.
2000 points.
Mission: Contact Lost.
Returning to oversee the war against the alien Tau on D'Then, Typhus orders his troops to push forwards. Tau communication station 12 falls to the advance without time to alert command. When no word comes within 24 hours, the Tau dispatch a scouting force to determine the fate of their silent comms station. What they find is a powerful Death Guard force waiting for them.
Adam and I came together again to wage war for the world of D'Then. This was just a random pick up game and we decided to roll for it and we got the Contact Lost mission. We split the six objectives quite evenly down the table for fairness and I got to chose went first. Adam had chosen to field an Infiltration Cadre (I think it's called) which meant that if I wiped anything out he got all his reserves come in straight away on his next turn. So with that in mind I decided to let him have the first turn, which I don't think he was too happy about. Hehehe.
Annoyingly he started on of the objectives that he drew the card for so he was going to be on the leading foot anyway. He simply moved up his small ground troops forwards baiting me to kill them. On my first turn I got one of the objectives that I started with and one right in his deployment zone. Typical Typhus ordering his men to do the impossible. With that in mind I charged Typhus' land raider down the table to try and get there as quickly as possible. The chaos knight moved down the middle of the board firing away but unfortunately for Adam leaving one man alive in the target squad. However, he pretty much got all his reserves come in turn 2 anyway which took the gloves off for me.
His scatter dice was on fire though. He deep striked two battle suit squads and a riptide into my deployment zone and each unit rolled spot on target with the scatter dice. Resolving shooting he popped a rhino and started gunning down the plague marines within. Three were soon left. At the end of his second turn he scored that same objective he started with a second time. Already he was three VP up and I had but one!
My turn two saw my raptors arrive from deep strike and they landed spot on in his lines behind a unit of pathfinders. Flamers and bolt pistol fire killed all but three of them as I recall. The Knight assault another unit and stomped them into bloody spots on the floor.
Third turn saw a massive combat in my deployment zone. Two battle suit squads and the riptide killed two plague marines and assaulted the remaining one. That one plague marine survived three whole game rounds of close combat before finally succumbing to his wounds. Man of the match! But he did his job and kept his guarded objective out of the hands of the alien enemy.
Unfortunately because we were playing lengthwise down the table, Typhus' land raider was not making much head way although it shrugged off every fire that was thrown at it. Normally I find Tau pop it straight away but this game it survived intact which was a wonder. It's only claim to fame this game was glancing the hammerhead to death over three turns. The knight then then charged into the ruins and began cutting down the main body of troops. The raptors assaulted the remaining pathfinders and tore them into chunks of bloody flesh. I was doing a good job of killing his troops but throughout the game he had the luck with the objective cards and it was obvious he was going to win from it.
Turns four and five went really quickly as we didn't have much left. Game ended turn 5 with Adam stealing victory 7vp to my 4. Good game but luck of the draw was definitely in Adam's hands. Man of the match was my lone plague marine and the wooden spoon goes to Adam's barracuda which failed to cause any wounds or damage all game.
My list:
*Typhus.
* Four termiantors with mark of Nurgle, lightning claws and land raider.
* Two units of 10 plague marines. Champion with plasma pistol and power weapon. Two meltaguns. Each unit with rhino with extra combi-bolter.
* One unit of 10 raptors. Mark of Nurgle. Champion with twin lightning claws. Two flamers.
* Chaos Knight with daemon of Nurgle, thermal cannon, chainsword and heavy stubber.
Region: Perdus Rift.
990.M41
Death Guard vs Tau Empire.
2000 points.
Mission: Contact Lost.
Returning to oversee the war against the alien Tau on D'Then, Typhus orders his troops to push forwards. Tau communication station 12 falls to the advance without time to alert command. When no word comes within 24 hours, the Tau dispatch a scouting force to determine the fate of their silent comms station. What they find is a powerful Death Guard force waiting for them.
Adam and I came together again to wage war for the world of D'Then. This was just a random pick up game and we decided to roll for it and we got the Contact Lost mission. We split the six objectives quite evenly down the table for fairness and I got to chose went first. Adam had chosen to field an Infiltration Cadre (I think it's called) which meant that if I wiped anything out he got all his reserves come in straight away on his next turn. So with that in mind I decided to let him have the first turn, which I don't think he was too happy about. Hehehe.
Annoyingly he started on of the objectives that he drew the card for so he was going to be on the leading foot anyway. He simply moved up his small ground troops forwards baiting me to kill them. On my first turn I got one of the objectives that I started with and one right in his deployment zone. Typical Typhus ordering his men to do the impossible. With that in mind I charged Typhus' land raider down the table to try and get there as quickly as possible. The chaos knight moved down the middle of the board firing away but unfortunately for Adam leaving one man alive in the target squad. However, he pretty much got all his reserves come in turn 2 anyway which took the gloves off for me.
His scatter dice was on fire though. He deep striked two battle suit squads and a riptide into my deployment zone and each unit rolled spot on target with the scatter dice. Resolving shooting he popped a rhino and started gunning down the plague marines within. Three were soon left. At the end of his second turn he scored that same objective he started with a second time. Already he was three VP up and I had but one!
My turn two saw my raptors arrive from deep strike and they landed spot on in his lines behind a unit of pathfinders. Flamers and bolt pistol fire killed all but three of them as I recall. The Knight assault another unit and stomped them into bloody spots on the floor.
Third turn saw a massive combat in my deployment zone. Two battle suit squads and the riptide killed two plague marines and assaulted the remaining one. That one plague marine survived three whole game rounds of close combat before finally succumbing to his wounds. Man of the match! But he did his job and kept his guarded objective out of the hands of the alien enemy.
Unfortunately because we were playing lengthwise down the table, Typhus' land raider was not making much head way although it shrugged off every fire that was thrown at it. Normally I find Tau pop it straight away but this game it survived intact which was a wonder. It's only claim to fame this game was glancing the hammerhead to death over three turns. The knight then then charged into the ruins and began cutting down the main body of troops. The raptors assaulted the remaining pathfinders and tore them into chunks of bloody flesh. I was doing a good job of killing his troops but throughout the game he had the luck with the objective cards and it was obvious he was going to win from it.
Turns four and five went really quickly as we didn't have much left. Game ended turn 5 with Adam stealing victory 7vp to my 4. Good game but luck of the draw was definitely in Adam's hands. Man of the match was my lone plague marine and the wooden spoon goes to Adam's barracuda which failed to cause any wounds or damage all game.
My list:
*Typhus.
* Four termiantors with mark of Nurgle, lightning claws and land raider.
* Two units of 10 plague marines. Champion with plasma pistol and power weapon. Two meltaguns. Each unit with rhino with extra combi-bolter.
* One unit of 10 raptors. Mark of Nurgle. Champion with twin lightning claws. Two flamers.
* Chaos Knight with daemon of Nurgle, thermal cannon, chainsword and heavy stubber.
Wave Assault - Abraxes
Planet: Abraxes.
Region: Ceres Sector.
919.M41
Death Guard vs Tyranids.
Mission: Wave Assault.
Deployment: Special.
Points: 1750.
This was a continuation of Joel and I's game from a couple weeks ago. We chose the next Tyranid mission from the Battle Missions book and prepared for that. I decided to be a little non-thematic this time and build a list around the Black Crusade detachment for no reason other than I wanted to give it a second go. It is much better against Imperial opponents but this was just going to be a fun game.
Joel's list was a little tougher than before. He had to split his into three waves which would randomly come from a random table edge that had been used before. Wave 1 was his thematic remnant from the last game (carnifex and two small units of genestealers). Wave 2 was two flying hive tyrants and a large unit of gargoyles. The third wave was hordes and hordes of gaunts, supported by two zoanthropes, a tervigon, and a toxicrene.
I set up a unit plague marines holding the central objective, two CSM units in rhinos holding two others, a unit of raptors held back to engage where needed, a helbrute to the left defending the final objective, and finally Typhus and lightning claw terminators in a land raider to speed to where they were needed.
The first three rounds went really quickly as Joel's tyranids came in in wave order. I managed to take out a few but he had hidden most of his wisely in cover. Once everything was in it surged forth. The helbrute was dropped quickly by the hive tyrants and so I gave up on that objective to focus on the other three. The raptors did nothing really. Despite being close to a huge units of gaunts they failed to get into combat and when they did on the following turn, they were shredded by sheer number of dice. Disappointing as I had taken the time to build those models just for this mission. Typhus and his terminators likewise did nothing. The land raider was dropped by the zoanthropes and the only possible target for them was the toxicrene which proceeded to kill all of them rather too quickly for my tastes.
The chaos marines were also soon cut down by either gaunts or the two hive tyrants. Only the plague marines actually put up much of a fight. But come turn 5 even they dropped and Joel won by wiping me out across the table.
It was a good game and I know that I had chosen the wrong detachment but sometimes you need to try things out. Joel was extremely certain that i would win simply because of the mark of Nurgle on everything but I was certain he would win simply by numbers of dice. My army is just too expensive to compensate but next time I'll give some more thought to what I need to bring them down.
Black Crusade detachment.
*Typhus.
* One unit of four terminators with pairs of lightning claws. Land raider as dedicated transport.
* Two units of chaos space marines. Mark of Nurgle. Champion with plasma pistol and power weapon. Flamer and heavy bolter. Both with Rhinos with extra combi-bolters.
* One unit of raptors. Mark of Nurgle. Champion with twin lightning claws. Two flamers.
* Helbrute with multi-melta.
* One plague marine unit. Champion with plasma pistol and power weapon. Two melta guns.
Region: Ceres Sector.
919.M41
Death Guard vs Tyranids.
Mission: Wave Assault.
Deployment: Special.
Points: 1750.
Weeks of fighting have led to a brief stalemate. Even the supernatural toughness of the Death Guard has failed to prevent them slowly being pushed back and the Hive Mind has been working overtime to combat the multitude of diseases released by Nurgle's chosen. Now the Tyranids have begun to close in around the Death Guard.
Typhus ordered his men to hold the line no matter the cost. Bludhaven would rot under Nurgle's gaze rather than be devoured by the Hive Mind. Surrounded by a swarm of alien horrors, the Death Guard prepared to give their lives dearly.
This was a continuation of Joel and I's game from a couple weeks ago. We chose the next Tyranid mission from the Battle Missions book and prepared for that. I decided to be a little non-thematic this time and build a list around the Black Crusade detachment for no reason other than I wanted to give it a second go. It is much better against Imperial opponents but this was just going to be a fun game.
Joel's list was a little tougher than before. He had to split his into three waves which would randomly come from a random table edge that had been used before. Wave 1 was his thematic remnant from the last game (carnifex and two small units of genestealers). Wave 2 was two flying hive tyrants and a large unit of gargoyles. The third wave was hordes and hordes of gaunts, supported by two zoanthropes, a tervigon, and a toxicrene.
I set up a unit plague marines holding the central objective, two CSM units in rhinos holding two others, a unit of raptors held back to engage where needed, a helbrute to the left defending the final objective, and finally Typhus and lightning claw terminators in a land raider to speed to where they were needed.
The first three rounds went really quickly as Joel's tyranids came in in wave order. I managed to take out a few but he had hidden most of his wisely in cover. Once everything was in it surged forth. The helbrute was dropped quickly by the hive tyrants and so I gave up on that objective to focus on the other three. The raptors did nothing really. Despite being close to a huge units of gaunts they failed to get into combat and when they did on the following turn, they were shredded by sheer number of dice. Disappointing as I had taken the time to build those models just for this mission. Typhus and his terminators likewise did nothing. The land raider was dropped by the zoanthropes and the only possible target for them was the toxicrene which proceeded to kill all of them rather too quickly for my tastes.
The chaos marines were also soon cut down by either gaunts or the two hive tyrants. Only the plague marines actually put up much of a fight. But come turn 5 even they dropped and Joel won by wiping me out across the table.
It was a good game and I know that I had chosen the wrong detachment but sometimes you need to try things out. Joel was extremely certain that i would win simply because of the mark of Nurgle on everything but I was certain he would win simply by numbers of dice. My army is just too expensive to compensate but next time I'll give some more thought to what I need to bring them down.
Black Crusade detachment.
*Typhus.
* One unit of four terminators with pairs of lightning claws. Land raider as dedicated transport.
* Two units of chaos space marines. Mark of Nurgle. Champion with plasma pistol and power weapon. Flamer and heavy bolter. Both with Rhinos with extra combi-bolters.
* One unit of raptors. Mark of Nurgle. Champion with twin lightning claws. Two flamers.
* Helbrute with multi-melta.
* One plague marine unit. Champion with plasma pistol and power weapon. Two melta guns.
Monday, 14 November 2016
Blitzkrieg - Bludhaven
Planet: Bludhaven.
Region: Sereaphon Sector.
845.M41
Death Guard vs Orks.
Mission: Blitzkrieg.
Deployment: Special.
Points: 2000.
After making planetfall the Death Guard began to fortify their landing site in preparation to take battle the greenskins. However, the Ork horde had other plans and launched a fast attack on the barely prepared chaos forces. Sorcerer Cholic ordered the few teams of bikers to intercept while the remaining ground forces advanced behind them. Battle was soon joined but the Death Guard found themselves quickly outnumbered and out gunned.
I don't get to play against Orks very often. In fact I think it has been a couple of years since I last made war against them. So when my friend Jon challenged me with his Orks I was very pleased. I asked him to pick a mission and he chose Blitzkrieg from the Battle Missions book. As I still don't have a lot of time to paint and build I knew I was going to be on the back foot here. The mission really requires fast attack options and right now I have three chaos bikes and that is it. Still I wasn't going to let that spoil my fun so that was my option.
The Blitzkrieg mission requires only fast attack options to start on the table in opposing corners. Everything else, on both sides, has to sit in reserve waiting to come in. My choice was three bikes and Jon's was a nice sized squad of warbuggy's. The game gave him the first turn and thankfully for me none of his reserves came on the table. However, I got a handful of my units including my Chaos Knight, which proceeding to blast through the buggy unit.
I pretty much decided that there was no way I could hold all three objectives so I focused on the two nearest me and dispatched squads of plague marines, chaos terminators and chaos marines to take them. The turns went quickly as both of us failed to get our units in from reserve. Battle was hard fought around my objectives, and the Knight spent it's time smashing deffkopta's and a large unit of boyz before it finally fell. When i say fell, I mean it fell over backwards and crushed my sorcerer and his chaos marine bodyguards. But it had definitely earned it's points that night before it went down.
It was about this time that my game began to fall apart. Jon's Orks smashed through what I had left trying to contest the central objective, and I completely forgot that he had a small truck under the landing platform where the first objective was sitting. So when the game came to an end turn 6 he had the victory.
Having seen the mission requirement I knew that this was not a game I could win easily. As I have repeatedly said I need the time to expand the army options that I currently have. Had I had more fast attack options I may have done a little better in this one but I don't mind. It was just nice to play against the greenskins again after so long.
The Orks surrounded the Death Guard landing site and through sheer force of numbers obliterated the first wave of chaos marines. Cholic somehow survived the cataclysmic death of the Knight through this psychic skills, but upon informing Typhus of his losses on Bludhaven, he had soon wished that it had crushed him! Typhus called for his champions and teleported to the surface of the planet.
Region: Sereaphon Sector.
845.M41
Death Guard vs Orks.
Mission: Blitzkrieg.
Deployment: Special.
Points: 2000.
After making planetfall the Death Guard began to fortify their landing site in preparation to take battle the greenskins. However, the Ork horde had other plans and launched a fast attack on the barely prepared chaos forces. Sorcerer Cholic ordered the few teams of bikers to intercept while the remaining ground forces advanced behind them. Battle was soon joined but the Death Guard found themselves quickly outnumbered and out gunned.
I don't get to play against Orks very often. In fact I think it has been a couple of years since I last made war against them. So when my friend Jon challenged me with his Orks I was very pleased. I asked him to pick a mission and he chose Blitzkrieg from the Battle Missions book. As I still don't have a lot of time to paint and build I knew I was going to be on the back foot here. The mission really requires fast attack options and right now I have three chaos bikes and that is it. Still I wasn't going to let that spoil my fun so that was my option.
The Blitzkrieg mission requires only fast attack options to start on the table in opposing corners. Everything else, on both sides, has to sit in reserve waiting to come in. My choice was three bikes and Jon's was a nice sized squad of warbuggy's. The game gave him the first turn and thankfully for me none of his reserves came on the table. However, I got a handful of my units including my Chaos Knight, which proceeding to blast through the buggy unit.
I pretty much decided that there was no way I could hold all three objectives so I focused on the two nearest me and dispatched squads of plague marines, chaos terminators and chaos marines to take them. The turns went quickly as both of us failed to get our units in from reserve. Battle was hard fought around my objectives, and the Knight spent it's time smashing deffkopta's and a large unit of boyz before it finally fell. When i say fell, I mean it fell over backwards and crushed my sorcerer and his chaos marine bodyguards. But it had definitely earned it's points that night before it went down.
It was about this time that my game began to fall apart. Jon's Orks smashed through what I had left trying to contest the central objective, and I completely forgot that he had a small truck under the landing platform where the first objective was sitting. So when the game came to an end turn 6 he had the victory.
Having seen the mission requirement I knew that this was not a game I could win easily. As I have repeatedly said I need the time to expand the army options that I currently have. Had I had more fast attack options I may have done a little better in this one but I don't mind. It was just nice to play against the greenskins again after so long.
The Orks surrounded the Death Guard landing site and through sheer force of numbers obliterated the first wave of chaos marines. Cholic somehow survived the cataclysmic death of the Knight through this psychic skills, but upon informing Typhus of his losses on Bludhaven, he had soon wished that it had crushed him! Typhus called for his champions and teleported to the surface of the planet.
Wednesday, 9 November 2016
First Contact - Abraxes III
Planet: Abraxes.
Region: Ceres Sector.
919.M41
Death Guard vs Tyranids.
Mission: First Contact.
Deployment: Special.
Points: 1750.
After weeks of engaging in hit and run skirmishes with the genestealer cults across Abraxes the Death Guard have pulled back to their command bastion to prepare for the coming storm. As the first tendril appeared in the night sky the chaos marines spread out to better engage what was coming. At that point the genestealers burst from the sewers and ruins drawing the plague marines fire away from the descending vanguard of the Tyranid invasion.
Ever since I started my Death Guard army I had wanted to try them out against a Tyranid army. In all my years I have never managed to beat a Nids’ list and it would be nice to see how the Death Guard would fare. When my friend Joel challenged me to a 1750 point match I jumped on it. We decided to play the First Contact mission from Battle Missions as it was rather thematic.
I made a small mistake in not fully reading the rules properly and I misunderstood how the deployment worked, and gave my opponent an advantage. Basically the table is split into six equal size blocks numbered one through six, and as the defender I had to roll a D6 to see where each unit deployed, meaning that my army was spread about the table. I had read that the Tyranids rolled as well but could appear anywhere in that square when in fact they come in from the table edge or deep strike to that square if they are capable of it. So I en ended up deploying with the expectation that the vanguard of the hive fleet would pop up all round me. Big mistake.
My opponent had tried to build a fluffy list with lots of genestealers to start with (they are already on the planet after all) followed up by deepstriking winged hive tyrants, spore pods with carnifex’s and lictors.
To start with my opponent was very lucky being able to destroy my predator and take down one rhino with ease. My dice were not with me once again, especially the Helpack who spend the first the turn firing their multimelta’s into the air at nothing. They eventually started getting their backsides in gear but by then they were too far away from the enemy to play much more in the game.
I managed to retrieve some luck when one plague marine squad brought down a winged hive tyrant and blew it into red goo. That was probably my one victory all game. Otherwise both plague marine squads did little other than hold up enemy units for a few turns.
Typhus once again proved that he was not worth playing (why do I keep playing him?) as although he mowed down many genestealers, my opponent managed to get a big gribbly in combat with him and squash him. Pretty much every game my opponent managed to get him in combat with something he can’t handle and takes him down. Time to play someone else as my HQ for a while.
The last couple turns saw my helpack take down a spore pod and I managed to gun down a carnifex but it was too little too late. The genestealer units outnumbered me and managed to hold more objectives when the game ended turn 5.
Region: Ceres Sector.
919.M41
Death Guard vs Tyranids.
Mission: First Contact.
Deployment: Special.
Points: 1750.
After weeks of engaging in hit and run skirmishes with the genestealer cults across Abraxes the Death Guard have pulled back to their command bastion to prepare for the coming storm. As the first tendril appeared in the night sky the chaos marines spread out to better engage what was coming. At that point the genestealers burst from the sewers and ruins drawing the plague marines fire away from the descending vanguard of the Tyranid invasion.
Ever since I started my Death Guard army I had wanted to try them out against a Tyranid army. In all my years I have never managed to beat a Nids’ list and it would be nice to see how the Death Guard would fare. When my friend Joel challenged me to a 1750 point match I jumped on it. We decided to play the First Contact mission from Battle Missions as it was rather thematic.
I made a small mistake in not fully reading the rules properly and I misunderstood how the deployment worked, and gave my opponent an advantage. Basically the table is split into six equal size blocks numbered one through six, and as the defender I had to roll a D6 to see where each unit deployed, meaning that my army was spread about the table. I had read that the Tyranids rolled as well but could appear anywhere in that square when in fact they come in from the table edge or deep strike to that square if they are capable of it. So I en ended up deploying with the expectation that the vanguard of the hive fleet would pop up all round me. Big mistake.
My opponent had tried to build a fluffy list with lots of genestealers to start with (they are already on the planet after all) followed up by deepstriking winged hive tyrants, spore pods with carnifex’s and lictors.
To start with my opponent was very lucky being able to destroy my predator and take down one rhino with ease. My dice were not with me once again, especially the Helpack who spend the first the turn firing their multimelta’s into the air at nothing. They eventually started getting their backsides in gear but by then they were too far away from the enemy to play much more in the game.
I managed to retrieve some luck when one plague marine squad brought down a winged hive tyrant and blew it into red goo. That was probably my one victory all game. Otherwise both plague marine squads did little other than hold up enemy units for a few turns.
Typhus once again proved that he was not worth playing (why do I keep playing him?) as although he mowed down many genestealers, my opponent managed to get a big gribbly in combat with him and squash him. Pretty much every game my opponent managed to get him in combat with something he can’t handle and takes him down. Time to play someone else as my HQ for a while.
The last couple turns saw my helpack take down a spore pod and I managed to gun down a carnifex but it was too little too late. The genestealer units outnumbered me and managed to hold more objectives when the game ended turn 5.
Subscribe to:
Posts (Atom)
Crusade Battles catchup
It's been a few weeks since I last updated and in that time I have played a further three Crusade games. I am really enjoying playing C...
-
Planet: Miridian. Region: Cadian Sector. 999.M41 Death Guard vs Dark Eldar. 1500 points. Mission: The Scouring. Through the ruins ...
-
It's been a few weeks since I last updated and in that time I have played a further three Crusade games. I am really enjoying playing C...